A blank wall becomes a full mural in under two hours. No scaffolding. No hired artist. No $800 labor bill. That's not a sales pitch — that's what a wall printing machine delivers on a regular workday for businesses and homeowners who've spotted one of the most underpriced opportunities in the decoration industry right now.
So, what is a wall printing machine used for? Most articles skip past that question and dump you straight into spec sheets. This piece won't do that.
What follows is a straight breakdown — ten real-world applications, with real numbers, real limitations, and a clear look at who should (and shouldn't) be writing a check for one.
Residential & Home Interior Customization
Homeowners are sitting on blank canvases. Most of them don't know it yet.
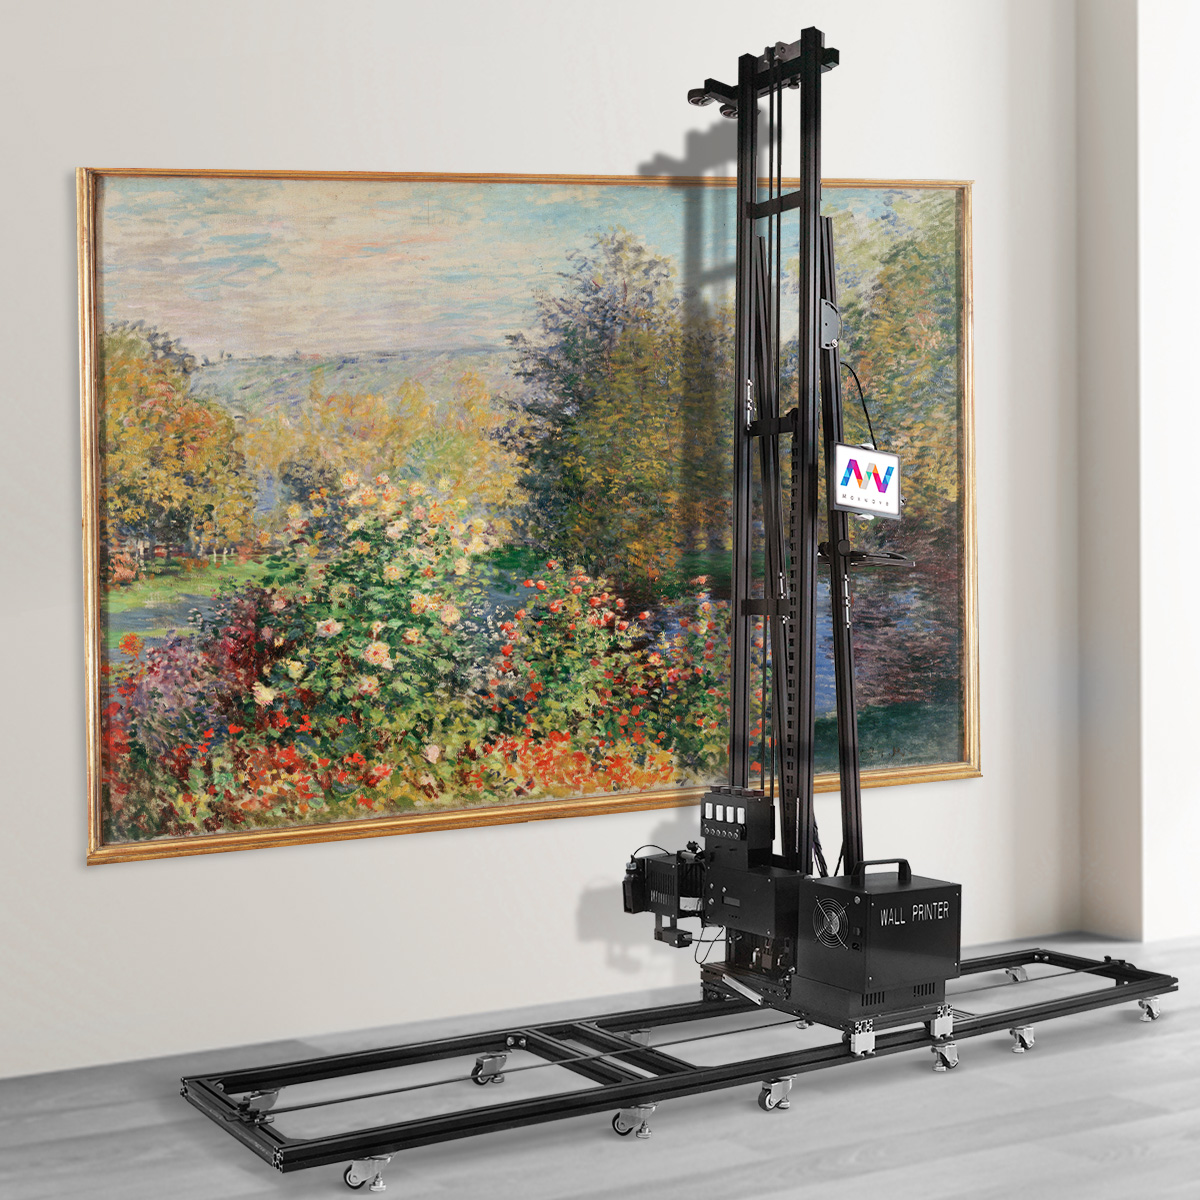
Every plain white living room wall, every beige kids' bedroom, every builder-grade drywall panel — these are the exact surfaces a wall printing machine was built to transform. The technology is called direct to wall printing. In a residential setting, you load a digital file and the machine deposits UV ink onto plaster, drywall, concrete, wood, tile, or glass. The precision is beyond what any human hand can match.
Here's what that looks like in practice:
Living rooms: photorealistic scenic murals, oversized family portraits, marble-grain feature walls
Kids' rooms: cartoon themes, fantasy landscapes, custom growth-chart artwork scaled to exact wall dimensions
Bedrooms: soft-tone accent panels, photo headboard walls — often printed with water-based or eco-solvent inks to cut VOC exposure in sleeping spaces
The numbers speak for themselves. A 3m × 2.5m wall — a standard feature wall — takes a skilled muralist 1.5 to 2 full days and costs $400–$600 in labor alone. That same wall, printed digitally, takes about 1.5 hours and $3 in ink cost.
The quality holds up, too. UV-based inks produce sharp gradients and fine detail that brush strokes can't replicate at scale. On darker or tinted walls, a white-ink underlay pass brings color accuracy up to a true, vivid finish.
Printed walls are also repaintable with standard latex paint. Homeowners are not locked into a design — they can change it later. That removes the single biggest objection that comes up in residential sales conversations.
Commercial Branding & Retail Showroom Décor
Retail space is expensive. Every square foot costs money — rent, fit-out, fixtures, staff. Most brands still leave their largest surface blank or covered in peeling vinyl strips that were never quite straight.
A commercial wall printer changes that.
In retail showrooms and branded commercial spaces, direct to wall printing technology does what vinyl cannot: it makes the wall disappear into the brand. No seams. No panel borders. No screw holes from acrylic logo boards. The ink bonds to the painted surface — continuous gradients, photo-real imagery, and sharp typography in one uninterrupted piece.
The numbers speak for themselves:
A 4m × 3m branded backdrop wall using premium vinyl — materials, fabrication, lamination, and a two-person install crew — runs $800–$1,200 and takes 3–4 days from artwork approval to finished wall.
The same wall, printed on-site with a UV wall printer: $4–$5 in ink, one technician, about 3 hours total on site, and a retail charge of $400–$700 — saving the client 30–60% while keeping margins healthy.
Resolution matches the space. Automotive 4S showroom brand walls — viewed from across a dealership floor — print at 1440 dpi draft mode without any loss in visual impact. Close-up product storytelling panels in cosmetics boutiques or EV feature zones need 2880 dpi. At that setting, fine text and subtle gradients stay sharp at half a meter.
Model refresh? No vinyl to scrape off. A light sand and a primer coat get the wall ready for the next campaign.
Hospitality, Cafés & Themed Dining Spaces

Restaurants live and die on atmosphere. A well-placed mural doesn't just decorate — it works the room. It anchors the seating zone. It gives guests a reason to pull out a phone. Every photo posted, tagged, and shared carries your brand with it.
That's the business case for direct to wall printing technology in hospitality. Here's how the numbers back it up.
A 3m × 2.8m feature wall — the classic café accent wall or bar backdrop — takes about 2 hours in standard hospitality print mode. Ink cost runs around $3. The alternative? Commercial-grade patterned wallpaper for the same surface costs $500+ in materials alone. Add half a day of skilled labor for paste, seam alignment, and pattern matching. Then watch it start lifting at the seams within 12–18 months — especially near coffee bars and kitchen humidity zones.
The UV wall printer doesn't seam. It doesn't peel. It doesn't need three guys with a plumb line.
What Gets Printed
Four zones cover most hospitality applications:
Cafés: Origin maps, farm-to-cup storytelling, macro bean photography along the ordering queue. This content earns its wall space — it reinforces your brand story at the exact moment guests are standing still and looking around.
Bakeries: Ingredient flat-lays, open-kitchen process visuals, macro pastry shots that make the product look irresistible from six feet away.
Bars and themed dining: Deep-tone atmospheric murals — bottle silhouettes, cityscapes, vintage spirits imagery — printed behind booths and bar counters to hold the mood through a full dinner service.
Hotel F&B corridors and lounges: Destination photography and branded art panels that connect the kitchen concept to the broader hotel identity.
Color Management Is Not Optional Here
Food photography is unforgiving. Latte crema, pastry glazes, fresh produce — all of these need smooth gradients and warm, accurate browns. A badly calibrated CMYK wall printing setup gives you muddy ambers and gray-green avocados. Neither sells anything.
The fix is clear and non-negotiable:
Soft-proof all artwork under 2700–3000K warm white LED — the actual lighting in most cafés and bars — before running the full print
Use ICC profiles tuned for textured plaster or painted drywall to correct for ink absorption on porous surfaces
Run test strips on the actual wall substrate, not just a screen preview
The Instagrammable Wall Is a Real Business Metric
Hospitality branding agencies now design "social media corner" packages as a standalone service. The concept is simple: a well-framed booth or seating nook anchored by a bold wall art printing mural, positioned to produce shareable photography. Operators see real increases in guest tagging and check-ins once the mural zone is planned with purpose.
Printed murals also support seasonal refresh cycles that wallpaper can't match. Take an autumn coffee menu visual — sand it lightly, prime it, and overprint within a single morning session. The dining room reopens that same service period. Quarterly or biannual theme changes become a real option. That was never possible with paste-and-panel installations.
One note on scheduling: water-based inks are low-odor, but plan prints during off-hours — early morning or between services. Keep kitchen ventilation running throughout. This is standard practice in commercial restaurant mural work, and it keeps the whole process out of sight for guests.
Educational Campuses & Childcare Centers
Walk into most classrooms and the walls tell a story. Good intentions, slowly losing the fight. Paper posters curl at the corners. Bulletin boards pile up layer by layer — last semester's alphabet chart buried under this term's safety rules. Faded stencils from 2019 still hanging on. It's not neglect. It's just that nothing built for temporary ever stays that way.
A vertical wall printer ends that cycle for good.
Direct to wall printing technology replaces the whole stack of laminated printouts with one automated session. No more managing piles of curling paper for educational campuses and childcare centers. Alphabet walls, numeracy panels, animal themes for preschool rooms, campus corridor safety signage — all of it prints straight onto plaster. You get vector-accurate text and UV LED instant cure. Same-day classroom use. No drying window. No weather dependency.
The numbers speak clearly, and they matter most for schools running tight maintenance budgets:
6m corridor × 2m height, commissioned hand-drawn artist: 4–6 days, $1,500–$2,500, with inconsistent typography scaling and cure time that depends on humidity
Same wall, UV wall printer: 4 hours, $5 in ink, 100% vector accuracy, room back in use before the day ends
That turnaround is the whole argument. Schools don't have six-day windows. They have a holiday weekend, maybe a long Saturday. The large format wall printer fits that window. No stretching. No compromise.
Ink Spec and Noise — Two Non-Negotiables
Child-occupied spaces carry rules that retail and hospitality don't. Two specs sit above everything else:
Low-VOC or water-based certified inks — a hard requirement for enclosed learning spaces with limited ventilation
Sub-65 dB operation — the printer stays quiet enough to avoid disturbing teaching sessions in adjacent blocks
Print during weekends or holiday shutdowns. The indoor wall printing process moves fast enough that a full corridor refresh fits inside a standard two-day school break. No disruption to staff. No lost class time.
The result is clean, zone-based murals at reading corners, daily-routine stations, and play areas. They don't fight for attention in the room. They belong there.
Corporate Offices, Museums & Exhibition Panels
Corporate identity lives on walls. The lobby greets a client in the first eight seconds. The culture wall runs the length of a headquarters corridor. The historical timeline stretches across a museum gallery. These surfaces carry real institutional weight — something a framed poster simply cannot match.
A commercial wall printer handles all of it. The economics versus the traditional route are stark. They change how facilities managers and exhibit designers think about their budgets.
The Cost of Doing It the Old Way
Temporary fabric tension frames and modular board systems have been the industry default for corporate backdrops, press walls, and exhibition panels for years. The numbers say it all: a 5m × 3m event backdrop — fabric print, aluminum frame hardware, installation crew, logistics, storage — lands at $2,000+ per use. Per use. Every rebrand, every conference, every new campaign cycle resets that number.
The frames need storage between events. The printed panels get retired when messaging changes. That's a recurring waste cost built into the operating model — every single time.
Direct to wall printing technology cuts through that entire structure.
The same 5m × 3m wall — printed on-site onto plaster, drywall, or concrete — costs around $6 in ink. Setup and printing time runs about 2.5 hours. No frame inventory. No storage cataloging. No teardown debris. The wall itself becomes the medium.
Fabric/Boards | UV Wall Printer | |
|---|---|---|
Cost per use | $2,000+ (all-in) | ~$35 ink |
Setup time | Several hours, crew required | 2.5 hrs, 1–2 operators |
Teardown | Disassembly, storage, transport | Equipment removal |
Storage footprint | Frames + panels | None |
Refresh cycle | Reprint + reorder | Repaint or overprint |
Resolution and Color — Where Museums Don't Compromise
Corporate lobby walls viewed from across a reception floor hold fine at 100–150 ppi at final size. Museum interpretive panels and historical timeline sections are different. Visitors stand within half a meter and read the details up close. Those surfaces need 150–200 ppi. The large format wall printer delivers both — no equipment swap, just a settings change.
CMYK wall printing is standard workflow. Prepare files in CMYK. Convert fonts to outlines or embed them. Specify bleed where wall edges get trimmed. For multi-panel museum timelines, check panel joins carefully. Narrative flow cannot break across a section boundary. Typography must stay consistent across the full wall run.
For corporate brand walls, Pantone-to-CMYK conversion must match the supplied brand guidelines. This is where a hard proof on the actual substrate earns its keep. Get one before the full run on any job where logo color is specified in the contract.
Ambient Lighting Is a Real Variable
Museum galleries and corporate lobbies both use controlled lighting — and both affect how color looks on the final print. Matte painted walls under warm gallery lighting shift cooler tones in a visible way. Any design with white elements or one printed against a dark painted base needs a check. Verify the ambient lux level and color temperature before signing off on the file.
For close-read legibility in brightly lit gallery conditions, boost white ink opacity and raise black density a touch. This is a calibration step. It's not guesswork — it's a standard part of the process.
Tight Access Windows
Corporate HQ print jobs often run overnight. Museum installs happen before gallery opening or after close. The on-site printing window is a few hours per wall. File prep and proofing must be resolved before the operator arrives — no exceptions. Plan for 2.5 hours on a 5m × 3m feature wall. Build in time for mast assembly and the level check.
The wall is usable the same day. There's no drying window and no overnight cure delay under standard UV LED systems.
One thing wall art printing equipment cannot fix: surfaces that aren't flat. Significant undulation in plaster or uneven concrete relief throws off print registration on close-read text panels. Assess the surface before you schedule. In museum-grade applications, skipping this step is not an option.
Outdoor Advertising & Building Façade Murals
The side of a building is the largest billboard most brands will ever ignore.
Urban façades are everywhere. Brick warehouse walls along busy roads. Construction barriers around building sites. The bare concrete sides of parking structures. These surfaces get foot traffic and eyes on them all day, every day. Traditional wallscape advertising uses that opportunity — but the production model is painful. You're looking at 3–5 painters on suspended scaffolding, weather delays that turn a three-day job into a week, and campaign costs that often land between $15,000–$30,000 in major markets. Even a basic job on a single 8m × 3m wall can hit $3,000 in artist fees alone — and that's before scaffolding rental, PPE, insurance, and height-work permits.
An outdoor mural printing machine tears that model apart. From the ground up.
The operator stays at street level the whole time. A rail-guided mast moves up and down while the base unit rolls side to side along the wall. UV-curable ink prints straight onto brick or concrete and sets under on-board UV lamps — no drying wait, no weather delays. That same 8m × 3m wall takes about 6–8 hours of machine time with just one operator. Ink cost: $10. Typical selling price for an outdoor façade ad mural: around $2,700.
The math isn't subtle.
Surface, Resolution & Legibility Standards
CMYK wall printing at 720 dpi produces photo-realistic results. Sharp enough for full-scale portrait faces that stop people in their tracks from across the street. For outdoor ad text, keep letter height at 8 inches (20 cm) or taller. QR codes need at least 20 × 20 inches for sidewalk scanning to work reliably. At this scale, bold contrast and clean layouts beat detailed designs every time.
What the Machine Cannot Override
Surface condition matters more outdoors than anywhere else. The wall must be clean, dry, and free from loose paint or deep cracks before you run a single pass. Rain or moisture on the surface will disrupt UV curing — so plan your prints within a 10°C–35°C surface temperature range. Rough, heavily textured masonry or major surface bumps will throw off the print registration on fine details. Check the wall before you book the crew.
Industrial Facilities, Gyms & Public Wayfinding
Factory floors tell you everything about how a business thinks. Walk through a well-run warehouse and the walls do the work — zone IDs, directional arrows, safety protocols, process flowcharts. Everything unified. Everything readable at a glance. Walk through a badly managed one and you get the opposite: years of adhesive labels stacked on top of each other, stenciled symbols with spray bleeding into the corners, laminated sheets taped at odd angles. None of it matches anything else.
A UV wall printer turns that chaos into one clean, coherent visual system.
Take a 4m × 2.5m industrial wall. That size usually needs 6–10 separate aluminum or acrylic sign panels. Fabrication and mounting hardware alone runs $600–$900. Installation adds another 2–4 hours of drilling, anchor-setting, and shutting down part of the production area.
Wall printing technology covers the same space — process flowchart, safety icons, zone labels — as one continuous graphic. Print time: 1.5 hours. Ink cost: around $4. No drilling. No long downtime.
Gyms work the same way. Motivational murals, room IDs, training zone markers — printed once, all in matching brand colors and typeface. In high-traffic lanes, add a protective clear coat and the print holds up against equipment scuffs without issue.
A quick note on ink choice:
Latex inks are the right pick for enclosed gyms and transit corridors. Low VOC, fast-drying, and air-quality compliant.
Eco-solvent inks suit warehouses better. They handle heavy cleaning chemical exposure and offer stronger abrasion resistance, with emissions that stay manageable.
Floor, Ceiling & 3D Visual Extensions
Most decorators never look down. Or up. That's the opportunity.
Floors and ceilings are the two largest untouched surfaces in any commercial space. 3D wall printing technology now covers both. The results stop people mid-stride. They reach for their phones before they even think about it.
The mechanics work two ways:
Dedicated floor printer units drive across the surface and print straight onto the floor.
A standard vertical wall printer prints onto a primed panel — wood, composite, or rigid sheet. You mount that panel into the ceiling at ground level. No scaffolding needed.
Wall Printer USA used this second method: a printed wood slab, built into a custom ceiling panel, produced at floor height the whole time.
The 3D visual effect builds up in passes:
White underbase goes down first.
A full CMYK wall printing pass lays in the perspective-distorted anamorphic artwork.
High-build white layers stack onto the edges — cliff borders, protruding beams, the rim of a visual "hole" in the floor — wherever the depth needs to hit hardest.
A final CMYK detail pass ties everything together.
For a 3m × 3m zone, that full sequence takes 2 to 2.5 hours. Ink cost runs $3–4. Compare that to decorative epoxy inlay with stenciled graphics on the same footprint — 2 to 3 days of work, $1,000+ in materials and skilled labor, plus a 24 to 48-hour cure window that shuts down foot traffic.
UV ink skips all that. It cures the instant the lamp passes over it.
Topcoat Is Non-Negotiable
Any walkable surface needs two thin coats of industrial polyurethane or polyaspartic clear coat. Two thin layers — not one thick pour. A thick pour puddles over fine detail and ruins the effect.
A few things to check:
High-traffic mall floors should meet Taber abrasion standards.
Add anti-slip aggregate where local code calls for it.
The clear coat takes the abuse. The print underneath stays intact.
Recoat the protective layer every two to three years. The UV wall art underneath stays untouched.
Surface Limitations & Unsuited Environments
Not every wall qualifies. That's the part most equipment demos skip.
Knowing where a wall printing machine fails matters just as much as knowing where it works. Here's the honest list — surfaces and conditions that waste your time, your ink, and risk damaging your printhead.
Surface Problems That Kill Print Quality
Heavy texture or stucco walls are the most common trap. Inkjet heads need a throw distance of 1–2 mm for sharp output — 5 mm is the absolute max for acceptable results. Stucco or rough render with more than 3 mm of surface relief creates uneven gaps across a single pass. The result: scattered droplets, fuzzy edges, color banding. On severe texture, the carriage can strike the surface peaks directly — causing ink splatter, misaligned nozzles, and lasting damage to the printhead.
Loose or peeling paint is a hard no. UV ink needs a solid surface to grip. Flaking paint breaks away under carriage movement. It leaves voids in the print and pushes particles into the nozzle and encoder strip. That leads to misfiring and streaking. Strip peeling paint by hand or machine, then re-coat the wall before printing starts.
Raw, unsealed timber and very porous substrates pull ink down before the UV lamp cures it. Dot gain spreads. Colors go dull. Gloss turns patchy. A sealing primer fixes this. Without it, high-resolution direct to wall printing on raw wood or unsealed gypsum simply won't hold up.
Grease, oil, or silicone residue kills surface adhesion. Ink beads up, crawls across the surface, and scrapes off with a fingernail. Kitchen walls, industrial surfaces, and any surface near a release agent need full degreasing and surface-energy treatment before a single pass.
Curved or warped surfaces push zones outside the 1–2 mm sharpness range. Fine text breaks down. QR codes fail to scan. Any raised spot — a proud screw head, an un-sanded patch, a warped board edge — puts the printhead at direct risk of a strike.
Environmental Conditions That Stop the Job
Rain and surface moisture are immediate stop conditions. Free water blocks UV curing and adhesion. It causes wash-off and uncured patches across the print. Print only on dry surfaces — no exceptions.
Humidity above 80–85% slows UV curing, leaves surfaces tacky, and causes under-cure in dense dark areas. The safe range for UV wall printer operation sits at 40–60% RH. High-humidity days are not printing days for outdoor mural printing machine work.
Temperature extremes create real mechanical problems:
Below 5–10°C — ink viscosity rises. Droplet formation turns inconsistent. Ink lines can start to gel. This is where our Wallprintbox wall printer’s printhead heating function helps maintain a more stable ink flow around the nozzle area, reducing cold-start issues and improving droplet consistency.
Above 35–40°C — viscosity drops, dot gain increases, and outgassing from the substrate can cause bubbling under UV exposure. In hot or dry environments, the built-in printhead moisturizing system helps keep the nozzles from drying out during pauses between prints, reducing clogging risk and improving job continuity.
Both ends of the temperature range shift the head-to-surface gap in ways you can't fully control. The heating and moisturizing features do not make extreme weather irrelevant, but they give operators a wider and more stable working window compared with basic wall printer setups.
Wind and airborne dust push the problem even further. Dust can settle on the wall before curing, while wind can interfere with fine ink placement — especially on outdoor jobs.
The Preparation Reality
Here's the number most operators don't quote upfront: 70–80% of project time goes into surface preparation, not printing. That means filling cracks, sanding transitions, vacuuming debris, and degreasing. That ratio holds across residential, commercial, and outdoor wall decoration printing jobs alike.
The machine can't fix structural problems. Cracked masonry, spalled concrete, delaminating render — all of it needs patching and re-rendering before the printer touches the wall. UV wall art printing layers are microns thick. They can't bridge voids, level uneven steps, or hold together a failing substrate. Print onto a deteriorating base, and the artwork fails with it.
Prep determines outcome. Every time.
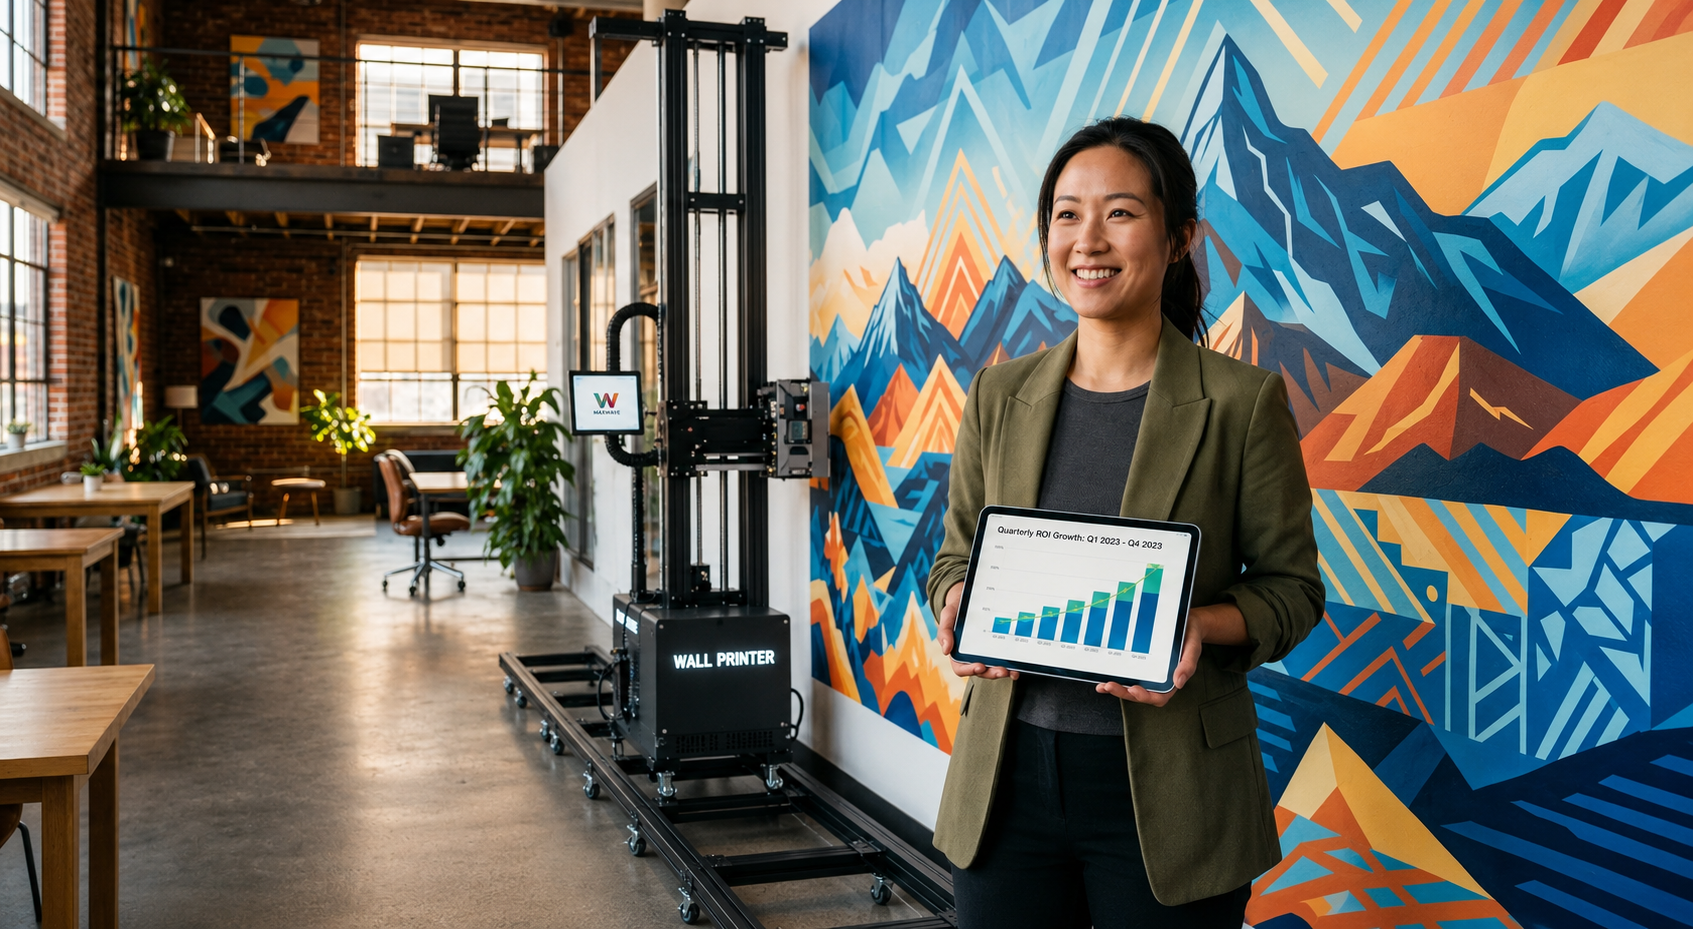
Investment Fit & Business ROI Breakdown
The numbers here are blunt. A wall printing business can return its full startup cost in under six months. That's not marketing language — it's what the actual job economics produce at moderate volume.
Who This Equipment Makes Sense For
Four operator profiles show up in this market:
Solo entrepreneurs and freelancers — Startup cost runs $9,000–$15,000, covering machine, ink, software, and basic marketing. Working 1–2 jobs per week generates $4,000–$8,000 per month. Payback lands at 2–3 months.
Print and ad shop owners — You already have design staff and client relationships. Adding a wall printer is a mid-level equipment upgrade, not a full business overhaul. The franchise model (Wall Printer USA style) sits at ~$50,000 total investment and requires $30,000 liquid capital. That's a fit for established shops, not first-timers.
Interior design studios — Wall printing fits neatly into bundled design-plus-install contracts. It's a high-margin add-on with no separate sales cycle needed.
Renovation contractors — The machine is mobile. It loads into a van, rolls onto a job site, and bills out as a premium upsell inside an existing renovation contract.
What the Job Economics Look Like
A solid baseline: $12,000 machine, priced at $150–$350/m², running 10 jobs/month at 10m² average. That’s 100m²/month of paid work, or roughly $15,000–$35,000/month in revenue. Ink costs run around $40/month, making consumables a very small part of the operating cost. Even after factoring in design time, travel, marketing, and basic overhead, the margin profile remains highly attractive for operators who can keep jobs booked consistently.
Push volume and the picture gets sharper. At 15–25m²/day with 70% utilization — about 300–500m² per month — revenue at $150–$350/m² hits roughly $45,000–$175,000/month. Keep overhead controlled at 30–35%, and the business can still retain a strong profit margin, especially because ink cost does not scale anywhere near as aggressively as revenue.
The top-cited scenario becomes easier to justify: a $40,000 printer generating around $9,216 profit per month can be paid off in just over four months. With stronger local pricing, larger commercial jobs, or higher monthly utilization, that payback window can become even shorter.
Add $50–$150 per job in design prep fees plus a mileage surcharge for travel. Per-job value goes up without adding any print time.
Before You Write the Check
Three operational requirements that never show up in equipment brochures:
Transport capacity — Most vertical gantry units need ≥2m³ enclosed cargo space. A standard SUV won't work.
Prepress capability — Color management, RIP software workflow, and basic Photoshop skills are not optional. File problems cut margins faster than any equipment failure ever will.
Market validation — Map out your B2B cycle: office refreshes, retail rebrands, residential renovations with set décor budgets. Build your lead-to-invoice process before the machine arrives. Not after.
For operators starting cold with no existing client base, a 6–12 month payback window is the straight conservative estimate. That's still a strong return on a capital asset. It's just not the five-month headline number. Knowing the difference protects your cash flow in those first few months.
Conclusion
Every blank wall you walk past is a missed opportunity. That's the mindset shift this technology brings.
Wall printing machines aren't just decoration tools. They're a scalable business engine. You close the gap between creative ambition and real commercial output — from a child's bedroom mural to a six-story building façade, from a café rebrand to a government cultural corridor. The use cases don't thin out. They compound.
At this point, one question separates serious investors from curious bystanders: how many of those 10 use cases map onto markets you already serve?
Three or more? You're not looking at a piece of equipment. You're looking at a revenue stream with a spray nozzle.
Direct to wall printing technology has matured. The learning curve is manageable. The ROI math is honest. Market demand isn't going anywhere.
One decision remains — do you want to be the person doing the printing, or the one still hiring them?
Ready to turn blank walls into booked jobs? Visit wallprintbox.com to explore our Business-in-a-Box wall printer package, calculate your ROI, and see how quickly your first wall can become your next revenue stream.